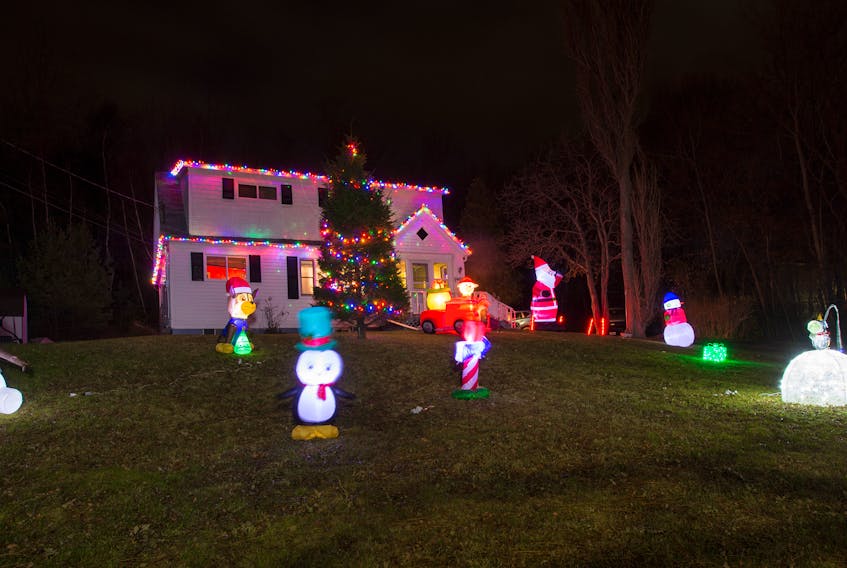
Everyone wants to get pictures of beautiful Christmas displays around the neighbourhood. Transfer those “Oohs and Aahs” to a photo on your desktop. Want to know a secret? It is easier than you think. If you have DSLR it is even easier.
All you need is your camera, tripod and a little patience. The most common myth is that pictures taken at night are taken when it is dark. The colourful hues in the sky and the amazing glow of the lights. Here is a little secret I’ll let you in on. You have about a 15-minute window where everything is just perfect. As I was taught by one of my instructors photography is hours of waiting and seconds of shooting. So grab a toque, warm jacket, a hot chocolate and let’s get started.
You will need your camera, a tripod and remote shutter release if you have one.
Once you have found a display that you want to photograph (of course your own is the best in the neighborhood) you need to find the angle to take it from. Make sure that it shows off the display well. Choose an angle that fills your frame with the display. This may take some time checking it out from many different angles. Now that you have found the perfect angle it is time to set up your tripod and camera. This can be done before dark and be set up and ready. This is when patience is a virtue. Here is where that 15-minute window comes in. It is just when the sun is down and the sky begins to darken. Dusk or just before. You can still just see detail in the sky. Now your 15 minutes of shooting glory begins. You can also try later in the evening to see what results that gives.
Make sure your camera is set to its manual mode and you have manually focused. (Sometimes auto focus will get confused in low light and not work properly.) Set your ISO (light sensitivity) to 200 and your Aperture (F Stop) to 8.
Now comes the reason you will need a tripod. The shutter speed will be very slow and will vary from display to display. Choose a speed that indicates on the light meter in the camera you are perfect. As there are so many light values the meter is reading this is a starting point. This could range from 2 seconds to 15 or longer depending on the situation. Now begin photographing the display.
Let’s say as an example you have set everything up, your ISO is 200 your F stop is 8 and the shutter speed the light meter says is correct is 4 seconds. Take a photograph that way and then try what is called bracketing the exposure. Bracketing is a fancy way of saying the exposure will be longer and shorter. From the 4 second exposure, try 1, 2, 8, and 16 second exposures. You can also try longer and shorter if you want to. With digital it doesn’t cost any more to take a lot of images and choose the perfect one when you look at them on your computer. This applies to any type of evening photography you would like to try. Show off your talent for capturing the Christmas spirit in your own back yard.
Mark Goudge is a professional photographer who works for the SaltWire Network.